How To Make Perry (Pear Cider)
Perry is very similar to apple cider but is made from pear juice instead of apple juice. It is usually smoother, slightly sweeter, less sharp in flavour than cider.
The instructions for turning pears into perry are almost identical to those for turning apples into cider.
This page describes easy to follow, step by step instructions on how to make Perry - it is not difficult, have a go!.
Dont worry if you dont have any equipment you can get a Complete Starter Kit that contains all the equipment that you will need. Alternatively you can begin with a Basic Starter Kit that contains all the equipment that you will need. Alternatively you can begin with a Basic Starter Kit and build up from there as you gain more experience. and build up from there as you gain more experience.
Also on this site are free plans and instructions on how to make your own fruit press and free step by step instructions on how to make your own scratter.
Making Perry is simple! Basically all you need to do is squeeze the juice from some Pears, add yeast and then sit back and wait for the yeast to turn the sugar in the juice into alcohol.
The following topics are covered:
Get yourself some Pears.
Pulp the Pears.
Press the Pears.
Ferment the juice.
Bottle your Perry.
When you have read this page you may like to learn more about perry or cider making. I recommend that you take a look at these books -
Real Cider Making on a Small Scale Includes instructions for apple pressing, step-by-step brewing and pasteurisation and cider-based food recipes.
Craft Cider Making A book for anyone who wants to make good cider or even simple apple juice. Whether you have a back garden with a couple of apple trees or you just 'scrump' apples from friends and neighbours this book is for you. You will learn about the equipment you will need, the techniques to use and just how they work as they do. The book is packed with a wealth of practical experience and understanding - it is for beginners and old hands alike.
STEP BY STEP INSTRUCTIONS
| |
| Get Some Pears |
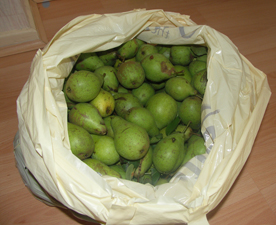
Get yourself some pears - dont use bought pear juice, it doesnt work very well - you'll be dissappointed with the results.
I got the pears in the photograph for free, from a tree growing at the side of a road. You may have some in your own garden or if not, there are a number of freecycle sites where |
|
| people offer a multitude of items free of charge - you can place wanted notes asking for pears.
Leave the pears to mature for 2 days to 1 week depending on the variety of pear used. If you dont leave them long enough then perry will contain little pear flavour. If left for too long then the fruit begins to rot from the centre outwards and will ruin the finished perry. You will need about 20lbs of pears for each gallon of perry. |
| |
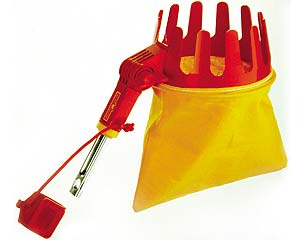
I pick a lot of my fruit from the countryside so it is not practical to take a pair of ladders with me. Also resting a ladder against a tree can be dangerous if you dont secure it properly.
I have found the safest and easiest way to pick fruit from trees is to use a fruit picker. This device fits onto the end of a pole and has upturned 'fingers' that you use to pull the fruit from the branches. When the fruit falls it is caught in a bag. This device fits onto the end of a pole and has upturned 'fingers' that you use to pull the fruit from the branches. When the fruit falls it is caught in a bag.
|  |
| |
| |
|
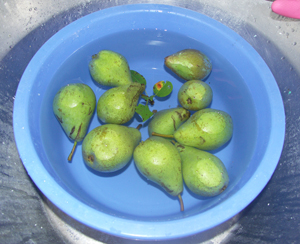
Once you have your pears and left them a few days thenext step is to wash them.
Throw away any that show signs of rot or have maggots in them. |
|
| |
|
| |
| Pulp the Pears |
After the pears have been washed they need to be cut into small pieces. There are lots of ways of doing this.
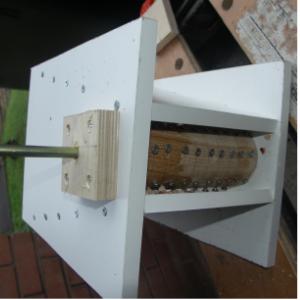
I made myself a scratter (photograph). The oak drum in the centre has stainless steel screws around its surface; it is mounted in a hopper which I made from melamine faced chipboard.
Take a look at my step by step instructions on how to make your own scratter. |
|
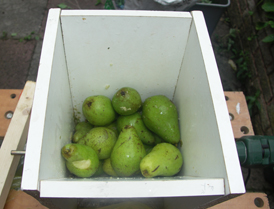
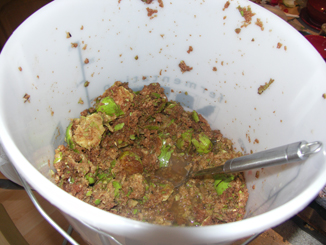
| The pears are dropped in from the top and when they hit the spinning drum (powered from my electric drill) the screws grind them into little pieces.
|
| |
As the pears are grated the pulp 'chips' fall into the Brewing Bucket below. |
|
|
| |
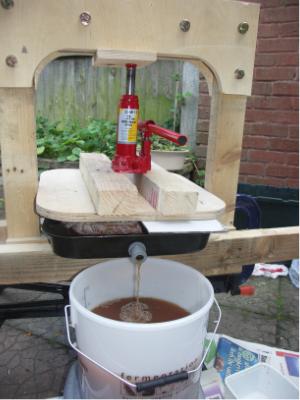
I appreciate that not everyone wants to make their own press.
If you want to buy one then take a look at the Fruit Press  in the photo. in the photo.
There are various types on the market that can be used for making juice from fruit and vegetables, and also for pressing herbs, cheese, honey and tomatoes etc. |
|
|
| |
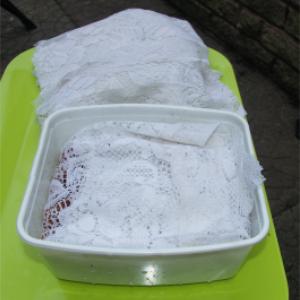
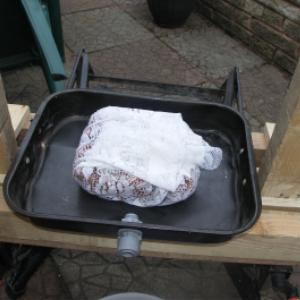
Before pressing the pulp it must be wrapped in cloth, otherwise it would just push out of the sides of the press.
I washed and sterilised a net curtain and cut it into squares. I placed the net in an ice cream tub and filled it with pulp. |
|
|
| |
Fold the net over to form a parcel. |
|
|
| |
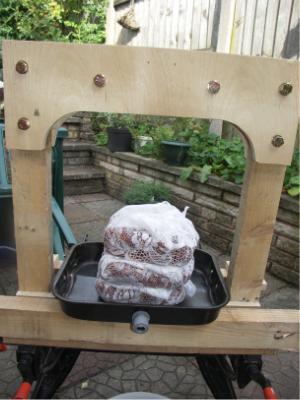
Place the 'parcel' of pulp in the press. |
|
 |
| |
| Keep stacking them! |
|
 |
| |
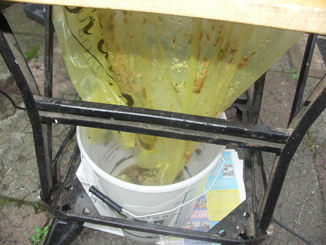
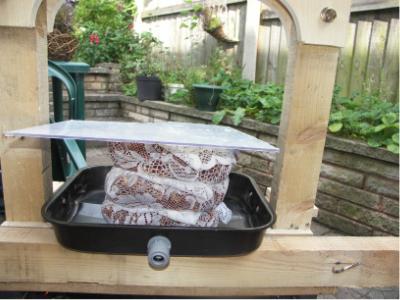
Top off with a piece of plastic (to stop the juice soaking into the wood). |
|
 |
| |
Insert the bottle jack. Pump it up until all the juice is squeezed from the pulp.
After pressing I put the remains of the pulp on my compost heap. |
|
 |
| |
| Fermenting the Juice |
For every gallon of juice add one Campden Tablet . This kills off any bacteria that may have been present in the pears or on their skins. . This kills off any bacteria that may have been present in the pears or on their skins.
For each gallon add one teaspoon of Yeast Nutrient . This is 'Yeast Food' that will help it grow during fermentation. . This is 'Yeast Food' that will help it grow during fermentation.
For each gallon add one teaspoon of Pectolase (Pectic Enzyme) . .
|
|
 |
This will stop your perry becoming cloudy. Leave for one day to allow the Campden Tablets to work on the bacteria. If you put your yeast starter in too soon then the Campden Tablets could stop it working. |
| |
Next I made a starter jar for the yeast. The purpose of this step is to get the yeast to start fermenting in a small jar with a low sugar content before adding it to your apple juice. The yeast I used was a General Purpose Wine Yeast . .
I sterilised a glass tumbler then added a teaspoon of sugar and and poured on boiling water.
|
|
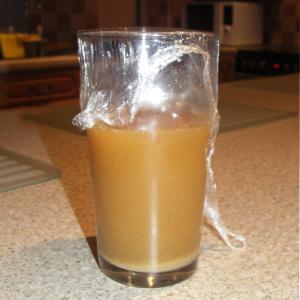 |
I stirred the sugar until it had disolved and then allowed it to cool to room temperature. I then added a pinch of yeast nutrient and poured in the contents of the yeast sachet. I covered the top of the tumber with cling film. After a few minutes the yeast started fermenting - bubbles rose from the bottom of the tumbler and a froth appeared at the top. I left this for about 4 hours at room temperature. This will do upto 5 gallons - for other quantities scale accordingly.
Important: Dont add the yeast until the water is at room temperature or you will kill it. Yeast is a living organism and cannot survive at temperatures above 30 degrees C.
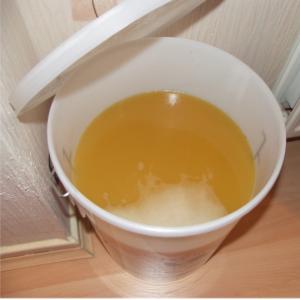
Add the yeast starter to your juice in the fermentation bucket. After a few hours it will start bubbling. Keep the lid on the bucket and leave for 4 days.
This stage of the process is called Primary Fermentation. |
| |
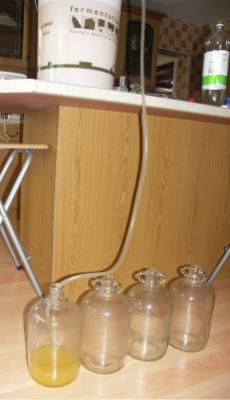
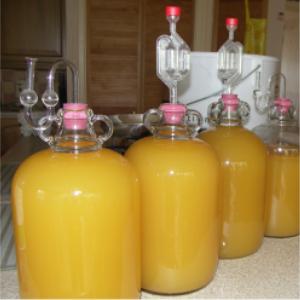
Siphon off the fermenting juice using a siphon tube into sterilised demijohns . It is important to fill them to the neck - too much air in the demijohns at this stage will turn your perry to vinegar. |
|
|
| |
Fit Airlocks to the top of the demijohns and leave at room temperature until the bubbling stops. This took two weeks in my case but it could take longer depending on the amount of sugar in the apples and the fermentation temperature. to the top of the demijohns and leave at room temperature until the bubbling stops. This took two weeks in my case but it could take longer depending on the amount of sugar in the apples and the fermentation temperature.
Leave for a few weeks at a cooler termperature for the yeast to fall to the bottom of the demijohn and wait for the cider to clear (I put mine in my garage).
When your Perry is clear then it is time to bottle it. |
|
 |
| |
| Bottling |
Sterilise your bottles first. To each bottle add a teaspoon full of sugar then siphon from the demijohn to the bottle using a siphon tube.
The purpose of the sugar is to give your Perry some fizz. There will be a small amount of yeast in the Perry when you transfer it to the bottles. This yeast will slowly ferment the teaspoon of sugar releasing carbon dioxide gas, just as it did in the demijohn. However there is no airlock on the bottles so the gas remains trapped - building up pressure in the bottle. When you unscrew the bottle cap, the gas is released giving you a sparkling refreshing cider.
Caution: The build up of gas will pressurise the bottles. Make sure you use suitable bottles or else they could burst. I used 2 litre sparkling water bottles.
Finally, pour yourself a glass, sit back, relax and be proud of your achievement! |
|
|
|
|