How to Build A Scratter
Below are step by step instructions on how to build your own scratter. From start to finish it took me about 3 hours to make.
Tools Required
Pillar Drill
Sash Clamp
Workmate  or Workbench or Workbench
Saw 
Plane
Screwdriver
Chisel
|
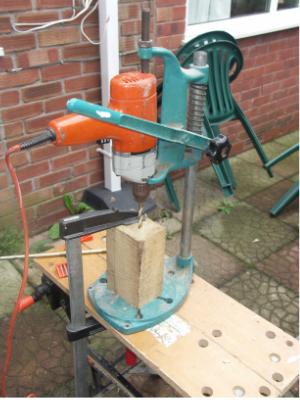
Step 1
Drill a hole through a block of oak.
Oak is a hardwood that will not split when wet. It is a traditional material used in the brewing industry. |
|
| |
|
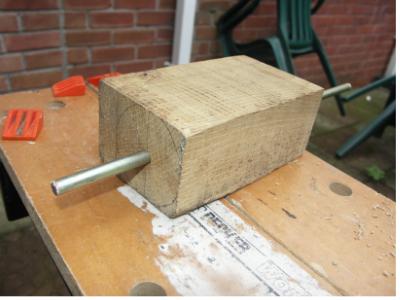
Step 2
Insert a non ferrous bar or stainless steel bar.
The material is important as iron for example would impart a horrible green tinge to your cider. |
 |
| |
|
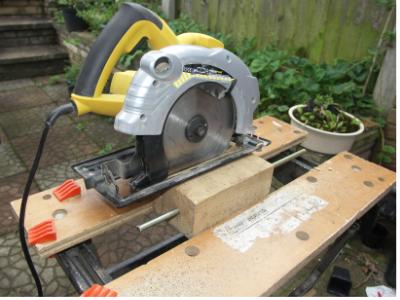
Step 3
Saw off the edge to make square. |
 |
| |
|
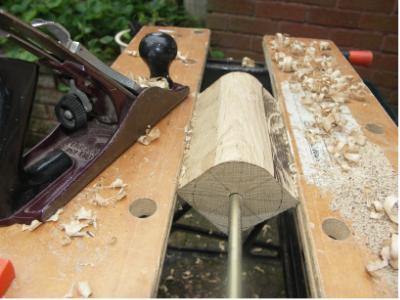
Step 4
Mark a circle on the end then plane off the square edges.
The diameter I used was 70mm.
The length of the cylinder was 170mm. |
 |
| |
|
|
|
| |
|
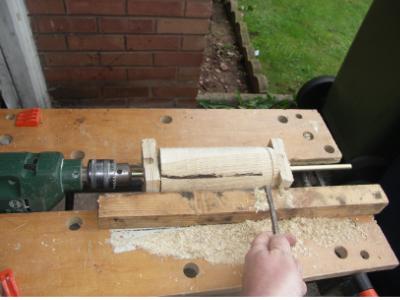
Step 5
Mount the rod on 2 end blocks. These are two square pieced of plywood with a hole drilled in the centre.
Make a 'home made lathe' using a drill to spin the cylinder. Use a chissel to make a smooth cylinder |
 |
| |
|
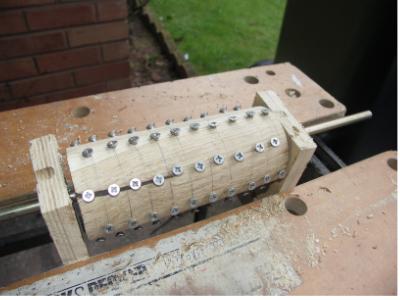
Step 6
Fit stainless steel screws around circumference. The screws are about 15mm long with about 5mm sticking out.
Leave 15mm between each screw and 30mm between rows.
The screws must be stainless steel as other metals could impart a horrible tinge to your cider. |
 |
| |
|
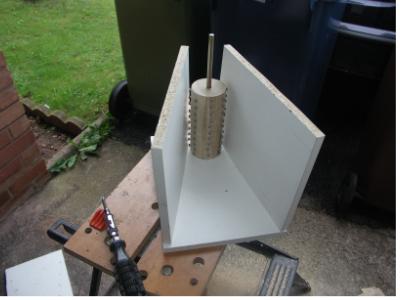
Step 7
Make a hopper from laminated chipboard. |
 |
| |
|
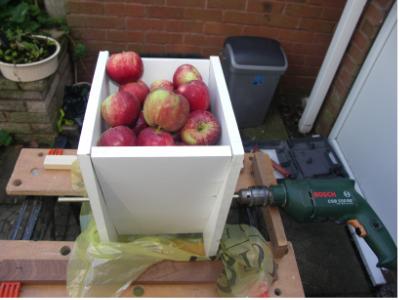
Step 8
Done! Go and make some scrumpy.
The drill spins the oak drum and the screws on the oak drum rip small pieces out of the apples. The yellow plastic 'skirt' directs the pulped apple into a brewing bucket below. |
 |
| |
|
I hope the above information has been useful to you and wish you well with your construction.
 
However if you find that constructing a scratter is beyond your capabilities or you do not have the time to do it then here is a ready made fruit pulper. Use an electric drill to spin the blade and cut through the apples. The juice and the apple pulp are cleanly contained in the bucket.
Click on the image to find out more.
|
|